Carving Wind Turbine Blades with a Chainsaw
inspired by Oztules in Australia
After my tail boom hit my last set of
blades I am starting the
process of carving another set. I am going to try pine: it is
strong, easy to carve, and has a low density making it light. The
finished blade will be 5' 2" long, 3.4" wide at the tip, 10.5" wide x
2.5" deep at the root.
You will need a jig saw, belt sander,
oscillating sander, sandpaper, and clamps. You will need to
modify your chainsaw to accomodate steel sleds to guide the chain over
the jigs. I used an arc (stick) welder to make these.
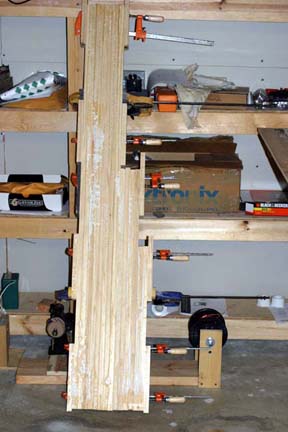
I will start this time with 6' x 2.5" x 3/4" joined pine.
Next, I use Gorilla Glue and clamps to
bond them together. I
am told that the glue joints are stronger than the wood itself.
Notice how I have saved some costs by joining less near the tips.
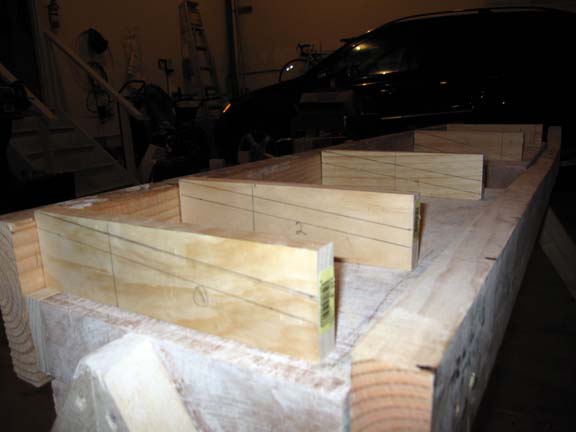
Here are pictures of the jigs and the bench setup to carve the windward side of the blades. I used a jigsaw to cut them, but you can also use a bandsaw. The two jigs on the left are for the windward side; the two on the right are the leeward side of the blade. I used a blade calculator program to choose the basic profile of the blade based on the TSR. The TSR is the Tip-(to-wind)Speed Ratio.

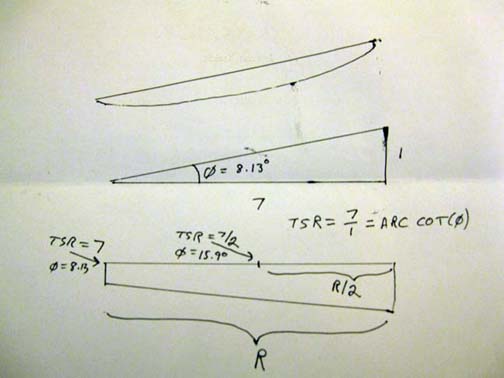
I guess a little theory will be useful. The windward side is at a slight angle from vertical at the tips. That is, the chord is at an angle. The arccot of the angle is the TSR. As one gets closer to the root the speed of the blade drops. At half the radius the speed is half. At one quarter the speed, and the TSR, is one quarter. The angle will have to increase towards the root to satisify the trigonomics. This is the "sweet spot".
Initially the wind is coming straight down from the top of the picture. The windward slant directs the wind thrust downward to start the motion. Speed picks up. The airfoil design results in the air being slower on the flat surface, and fast on the curved surface. This is because the wind splits into to streams when it hits the airfoil, but must rejoin at the other end. Faster air means lower pressure. This causes lift, which helps move the blade. This offsets the drag. The apparent wind direction moves clockwise on this picture as the blades speed up. The optimum speed will be when the stream parallel to the windward face.
Here is the jig setup for the windward cuts.
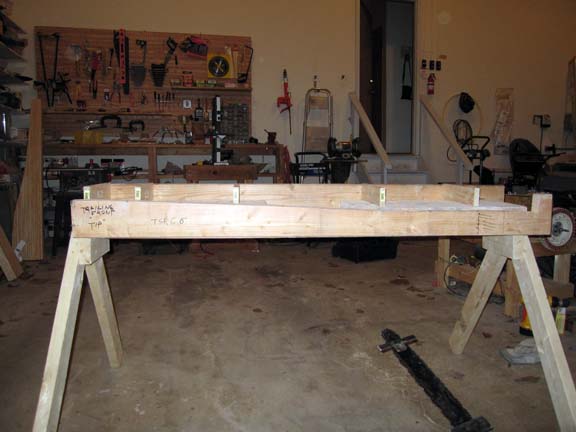
I took cross-sectional pieces the same thickness as the blade material and drew the profile. I use this to match against my chainsaw blade to make sure the cut will line up just right. I learned from my first trial to make sure you cut above the intended lines. Don't try to cut the final thickness of the section because the chainsaw will make a non-smooth cut which you will have to sand smooth. This will result in loss of thickness. If you want the blade to be 0.5" thick at the section and cut it to 0.5" thickness, you will ultimately have something less than intended after the sanding process.