I have a separate section devoted to carving blades with a chainsaw. This section goes into much more detail. You can view this tutorial here.
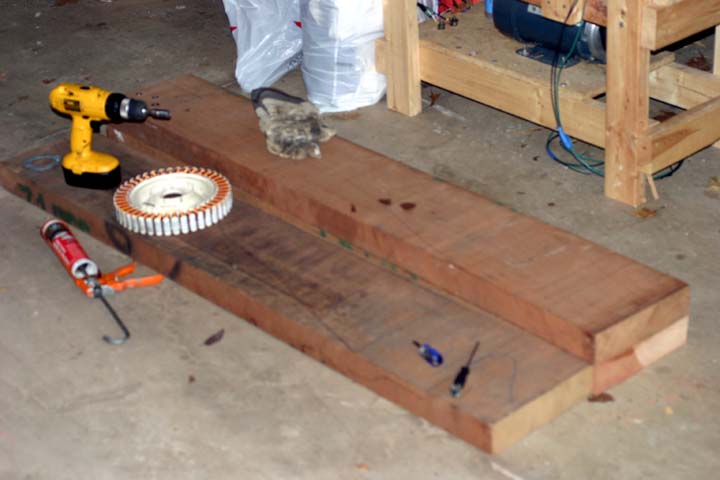
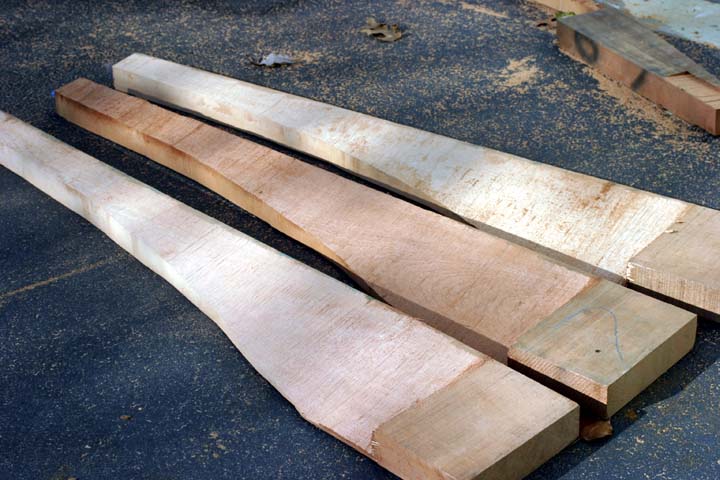
I originally wanted to use the aluminum 8.5' rotor. However, I had room for a bigger rotor and the 8.5' did not make enough power. In order to have anything bigger I was going to have to make my own blades. Various woods can be used. The important point is that one wants a high strength to weight ratio. In addition, one wants a wood that is not that heavy. If I am correct, the original propellers used during WWI were made of maple. It is very strong. Unfortunately, it is very heavy, and instead of a powerful engine turning the propeller, we want the wind to turn propeller. I chose cedar: it is light, strong and able to be used outdoors. I was going to make 5' 1" blades for a 10.5' rotor. I purchased 10 quarter (2.5" thick) x 10" cedar blocks.
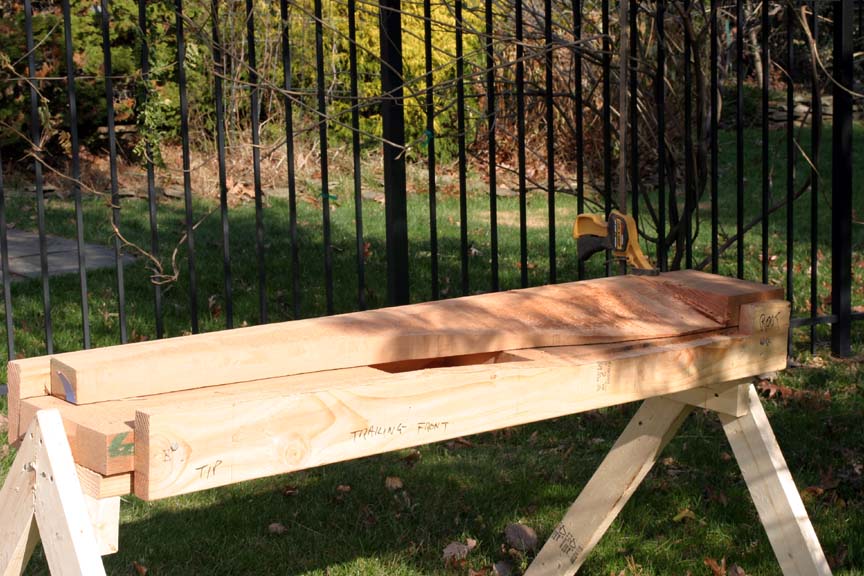
Carving was the next task now that I had my wood. Carving the entire block by hand seemed a formidible task. I read a post by Oztules at www.thebackshed.com where he used a chainsaw to carve the basic profile. I got a blade design calculator and determined the proper numbers along the blade stations. I used these numbers to make a jig that would guide the chainsaw to cut the block so I would have the appropriate thickness and pitch. Below is the jig and blocks set on it at various stations showing the pitch and thickness of the blade.

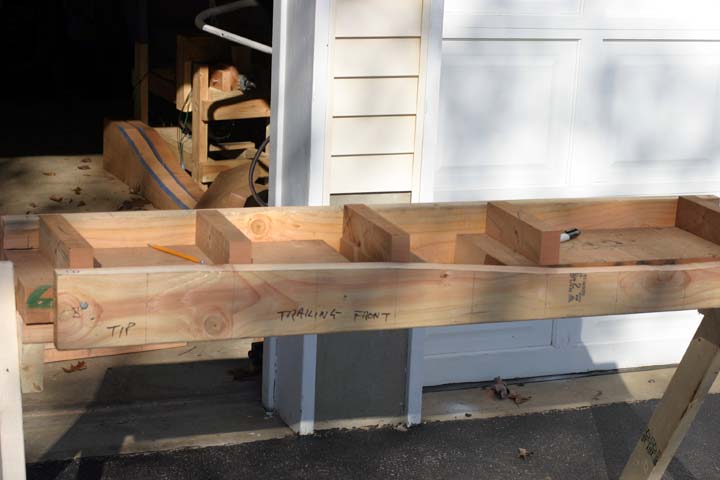
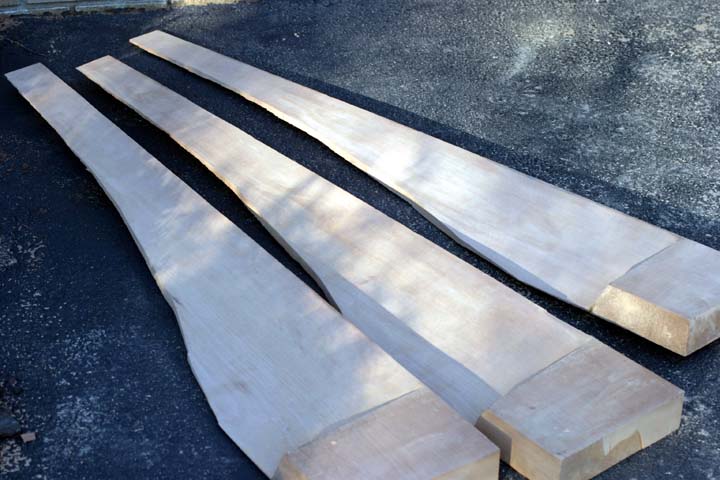
The curve is complex: it is not a straight line, but a curve. This gives the blade its twist. In the garage you can see the blades already cut to have the proper width. Below are the original cedar blocks.
I modified my chainsaw so it would ride on top of the jig's tracks. I welded some flat steel to a threaded rod and bolted it to the chainsaw. Below are pictures of the blade being cut on the jig.
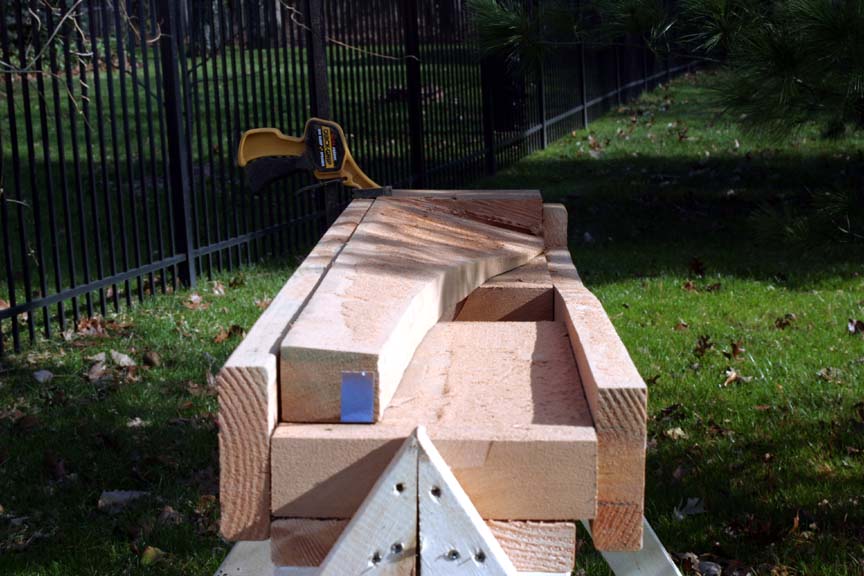
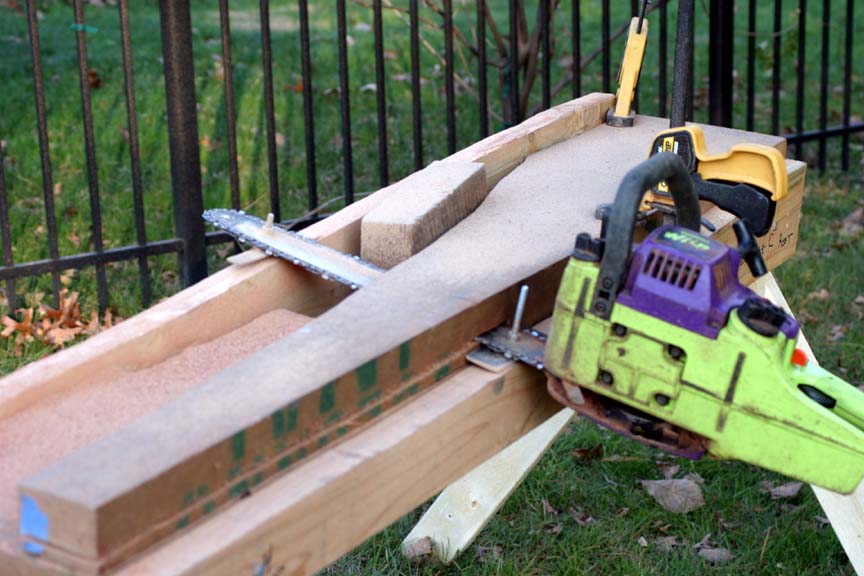
Above you can see the flat iron guides on the chainsaw. Make sure the chain is nice and sharp.
You can go to this link on YouTube to see me doing one of the cuts.
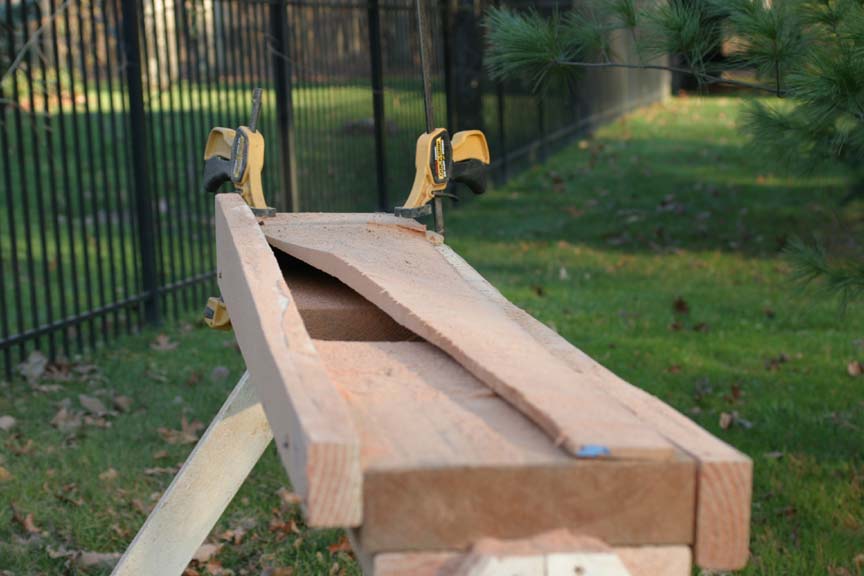
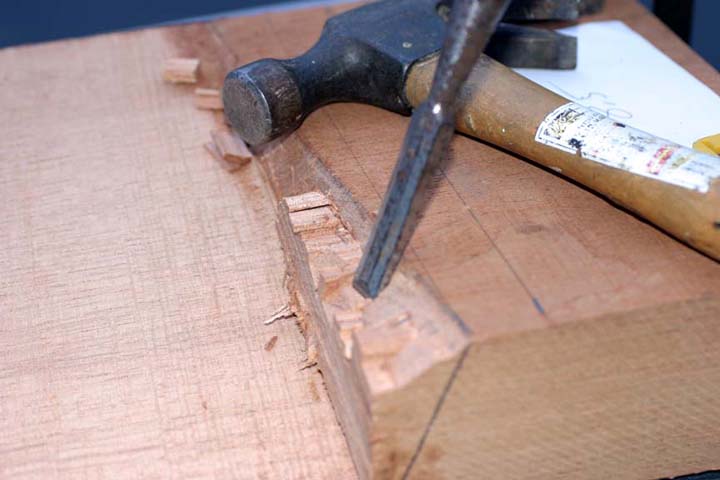
This blade is completely cut with the basic profile. Now it needs some chiseling and lots of power sanding. I used a belt sander with 80 grit belts. I also use some sanding boards and power flat sanders.
The fronts sides are sanded down. Now I have to do the same for the back. Then, I need to trim the roots. Once I am happy with the sanding I will seal the blades with two-part clear epoxy. The nice thing with the epoxy is it will seal and strengthen the blades. It will also allow me to adjust the shape. In other words, I can use the cedar for the core and mold the epoxy around it. Below are the blades after an initial coat.

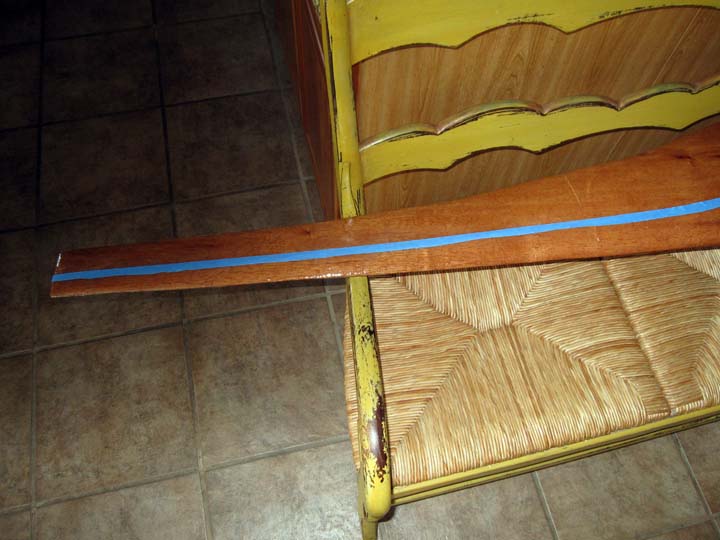
I want the thickest part of the blade to be 1/3 in from the leading edge. To help ensure this I ran some painter's tape down the 1/3 mark. I sanded the leading and trailing profiles, avoiding removing material from the marked area. Of course, I had to sand that part a little; but, after numerous applications and sandings I was able to achieve an excellent, smooth airfoil profile.